Remove/Recreate Windows recovery partition
By default, Windows is installed with a recovery partition, mostly at the last partition on disk.
When you need to shrink or expand your disk, you will be stuck with a recovery partition that cannot be moved.
This guide will help you to move, shrink, expand your windows partition with disk management tools bundled in Windows.
⚠️ Caution: Partition management has some risk to lose or not recover your data. Please backup before starting the process.
Check current partition
Right click on Windows and select Disk Management, you will see all disks installed in your system. Select Volume (C:); it will highlight the partition and disk that currently has Windows installed.
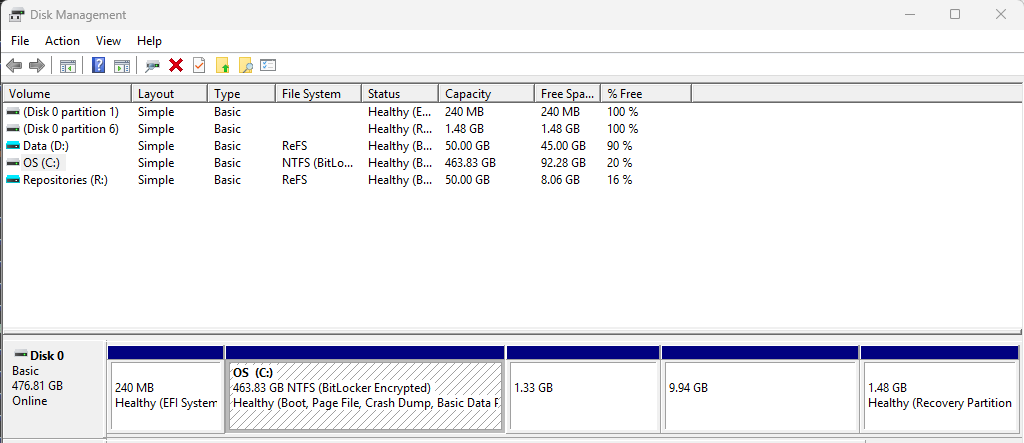
As shown in the image, the recovery and other partitions are blocked at the end of the disk. This prevents us from moving, shrinking, or expanding the Windows partition.
Next step, we need some step to complete our goal
- Remove recovery partition
- Move/Shrink/Expand Windows partition
- Re-Create recovery partition
Remove recovery partition
To remove partition, we will use diskpart to remove partition with step below
1
2
# Use diskpart to manage partition
diskpart
Prompt will change to DISKPATH>
1
2
3
4
5
6
Microsoft DiskPart version 10.0.26100.1150

Copyright (C) Microsoft Corporation.
On computer: DMSNTNG-PVE

DISKPART>
Check and delete your current recovery partition:
1
2
3
4
5
6
7
8
list disk
# where `#` is the disk needing the recovery partition removed
select disk #
list partition
# where `#` is the recovery partition
select partition #
# to force deletion of the recovery partition
delete partition override
Resize your partition
After removing the recovery partition, you will be able to resize or move the partition as needed.
- Expand/Shrink/Move the disk using Disk Management, leaving ~1024 MB at the end of the drive for recreating the recovery partition
If you have some trouble managing partitions, refer to the Troubleshooting section for more info
Re-Create Recovery partition
After managing the partition as desired, the next step is to re-create the recovery partition.
Create partition and copy recovery image
Create new partition (<=1GB) and assign to R: drive letter for temporary use, create WinRE folder structure:
1
2
mkdir R:\Recovery
mkdir R:\Recovery\WindowsRE
Copy recovery image to the partition
1
COPY C:\Windows\System32\Recovery\winre.wim R:\Recovery\WindowsRE\
If cannot find winre.wim see Troubleshooting section.
Mark partition as Recovery
Use diskpart to set GUID for the partition
1
2
3
4
5
6
7
8
9
10
11
12
13
list disk
# where `#` is the disk with the recovery partition
select disk #
list partition
# where `#` is the new recovery partition
select partition #

# For GPT disks run
set id=de94bba4-06d1-4d40-a16a-bfd50179d6ac
gpt attributes=0x8000000000000001

# For MBR disks, run
set id=27
Set WinRE to new image
The following commands will disable the current WinRE, set the recovery image path to the new location, and then re-enable WinRE:
1
2
3
4
5
reagentc /disable
# Set the recovery image path for WinRE to the new location
reagentc /setreimage /path R:\Recovery\WindowsRE\
# Re-enable the WinRE environment
reagentc /enable
Verify and remove assign drive letter
After re-enable, you can check recovery configuration by using
1
reagentc /info
Example output:
1
2
3
4
5
6
7
8
9
10
11
12
Windows Recovery Environment (Windows RE) and system reset configuration
Information:

    Windows RE status:         Enabled
    Windows RE location:       \\?\GLOBALROOT\device\harddisk0\partition4\Recovery\WindowsRE
    Boot Configuration Data (BCD) identifier: 820361a0-efb2-11ef-8321-cafe74c0ef77
    Recovery image location:
    Recovery image index:      0
    Custom image location:
    Custom image index:        0

REAGENTC.EXE: Operation Successful.
Now you can remove drive letter
1
2
3
4
5
6
7
list disk
# where `#` is the disk with the recovery partition
select disk #
list volume
# where `#` is the new recovery volume
select volume #
remove letter=R
Troubleshooting
Some steps have issues; this will help with common issues we often find
Cannot shrink a volume beyond the point
The reason why Windows won’t let you shrink the volume is as the message shown in Disk Management suggested, because there are immovable system files at the very end of the volume, as this screenshot from utility shows us. there are multiple things you could try to work this around.
Disable System Restore
Go to Settings -> About -> Advanced system settings -> System Protection and disable system protection for drive to be shrink
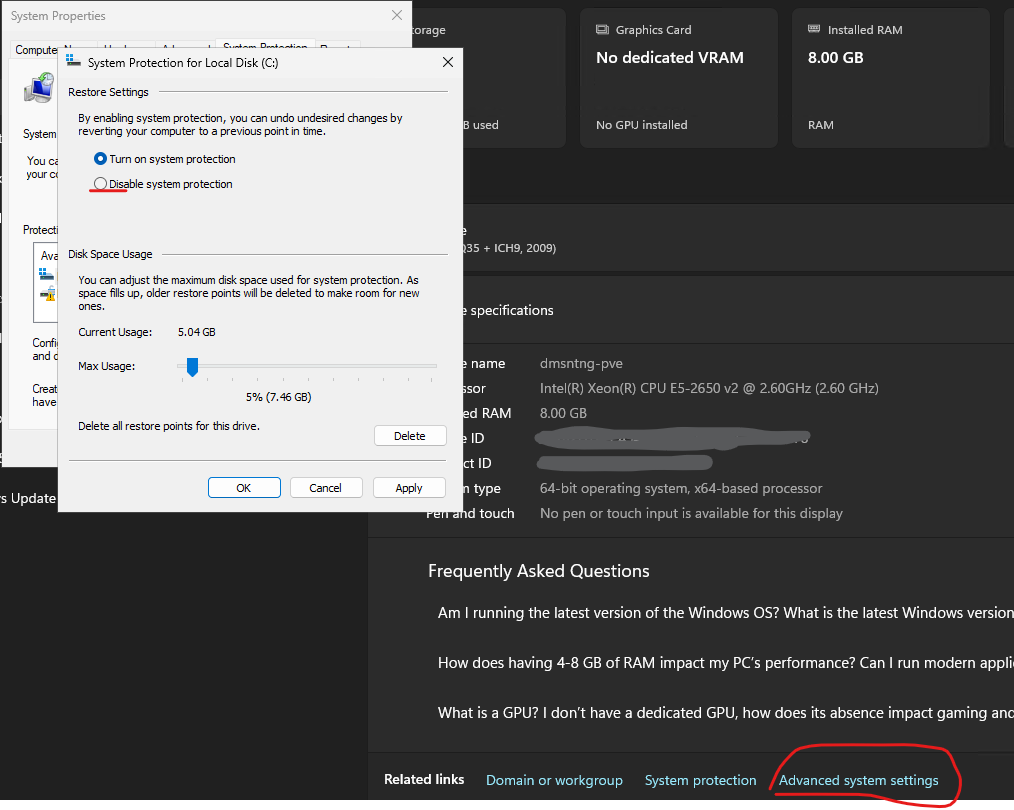
ℹ️ You can enable this later after complete shrink partition
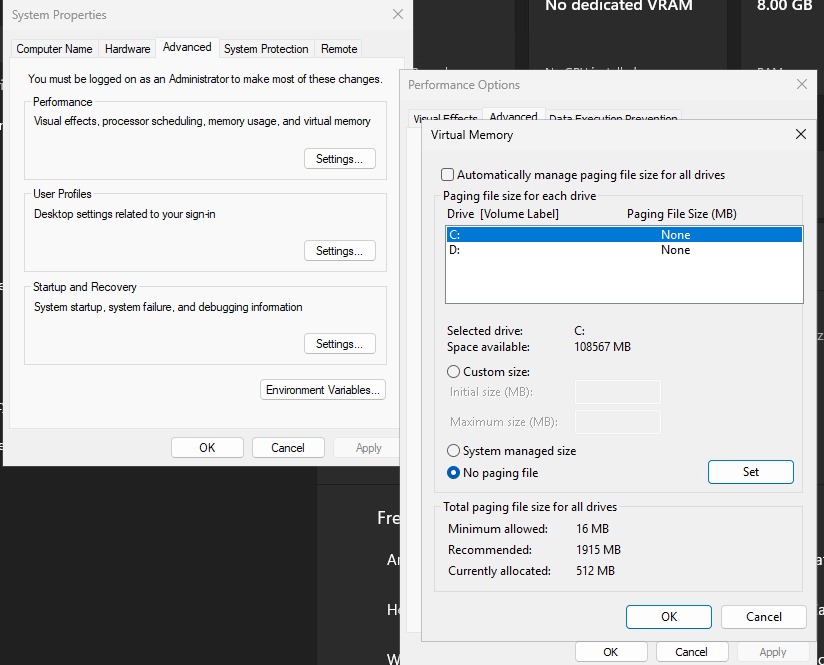
Disable pagefile
pagefile is virtual memory by using disk to caching data, it very helpful on system with low RAM
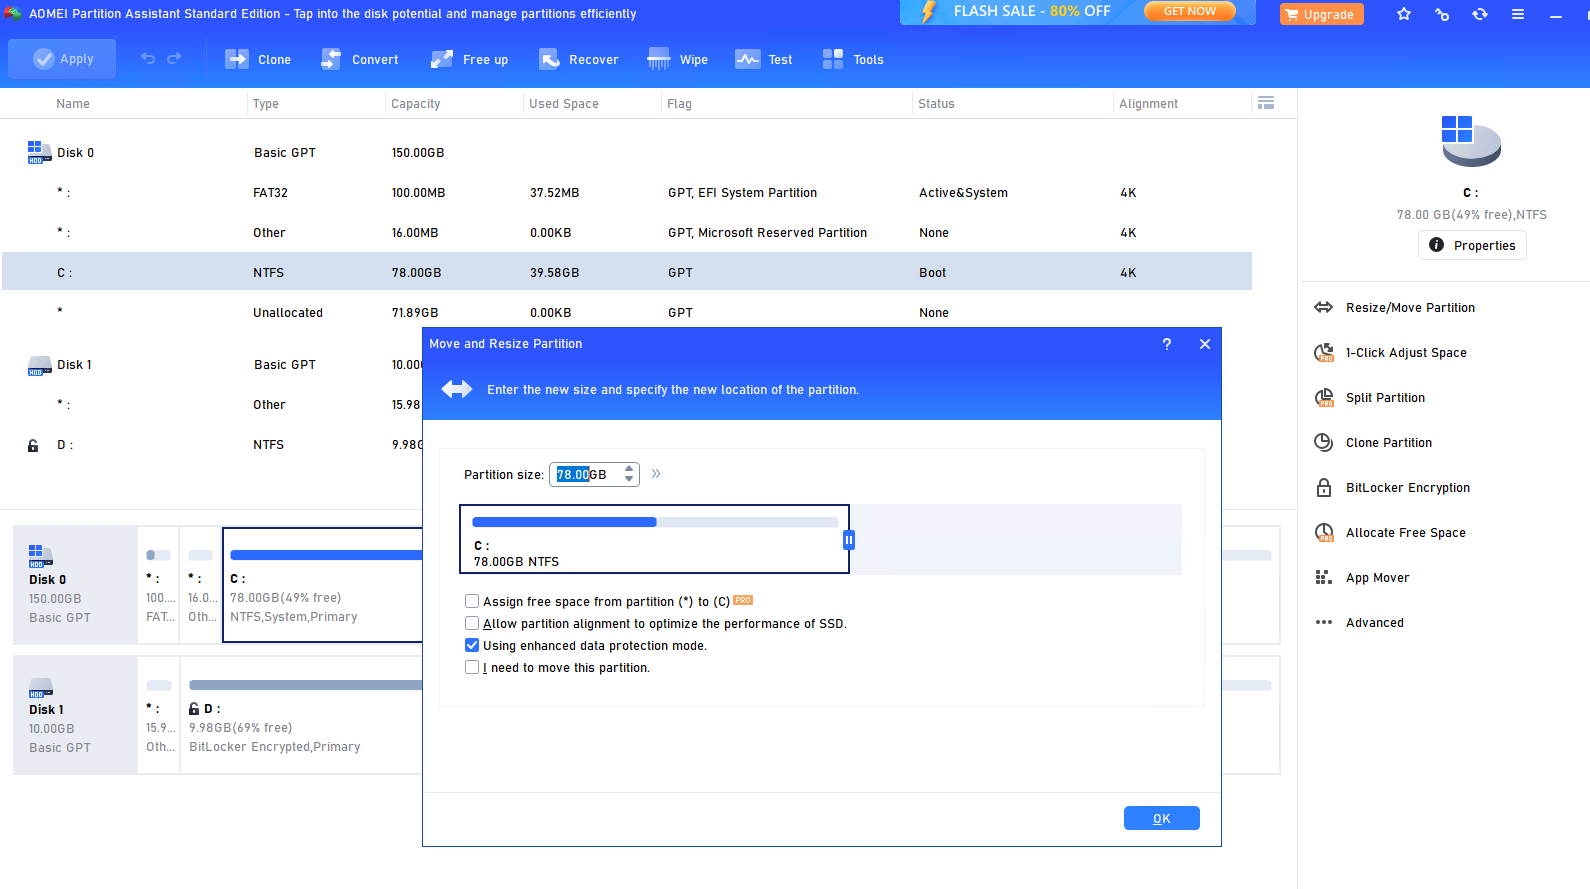
(Optional) Using 3rd software
Using 3rd software to resize partition if stuck with partition resizing process
In this case using AOMEI Partition Assistant Standard
Start program and select partition need to resize, specified new size as need
After confirm, program will ask for restart (because we’re resizing OS partition), select PreOS mode
It will automatically restart into PreOS mode and start resizing your partition
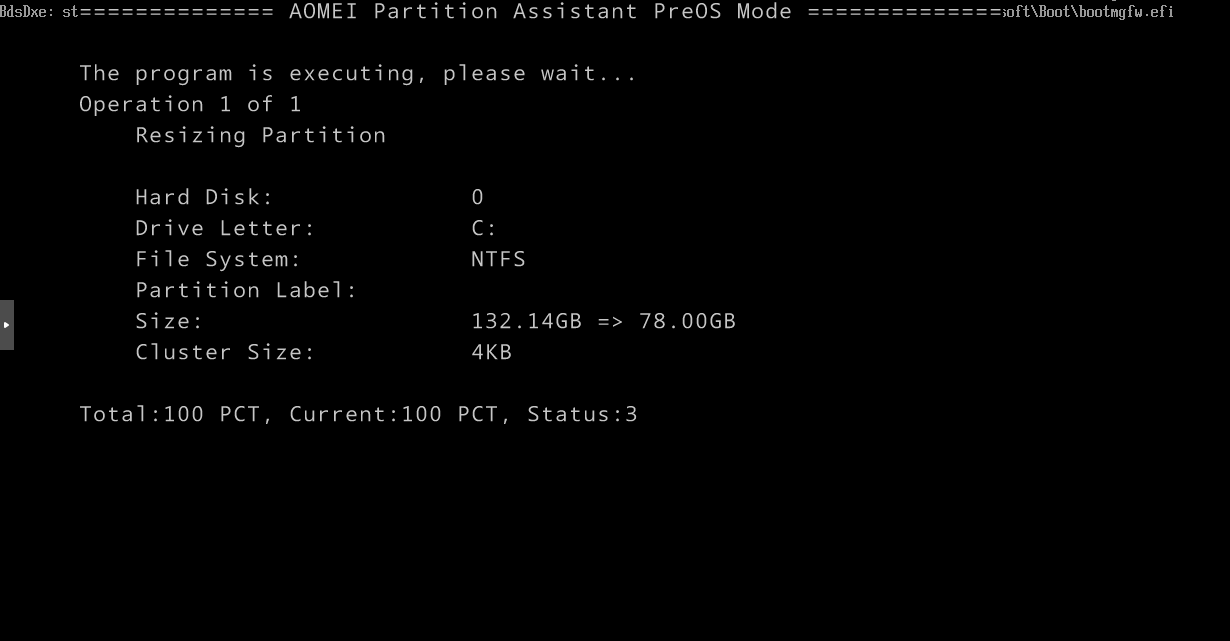
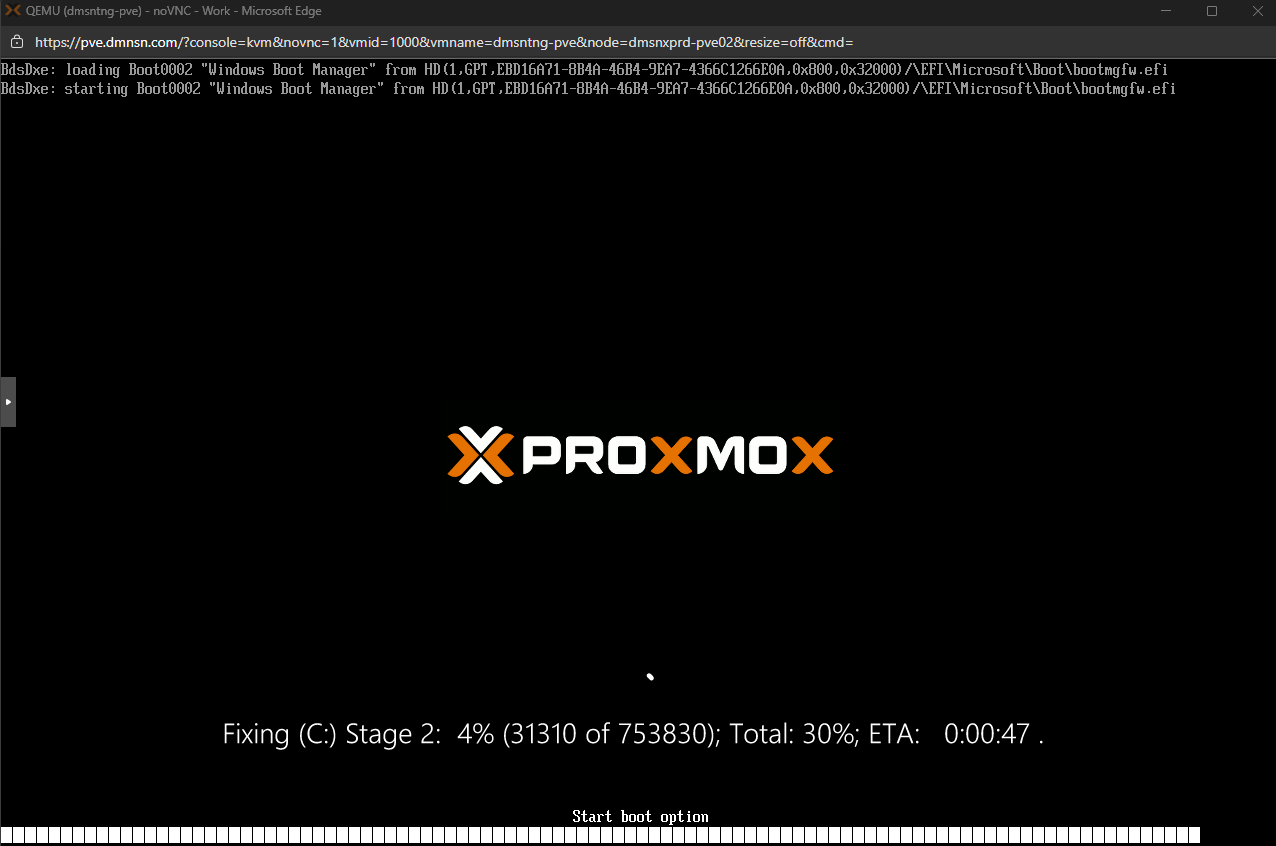
When resizing process completed, system will restart again and Windows will start disk scan because disk has changed to ensure OS can run normally
Cannot find winre.wim image
If you don’t find winre.wim in System32
- Download Windows ISO from Microsoft Download
- Mount ISO image
- Open
\sources\install.wimwith7-Zip- Extract
winre.wimfrom\Windows\System32\Recovery\winre.wiminsideinstall.wimimage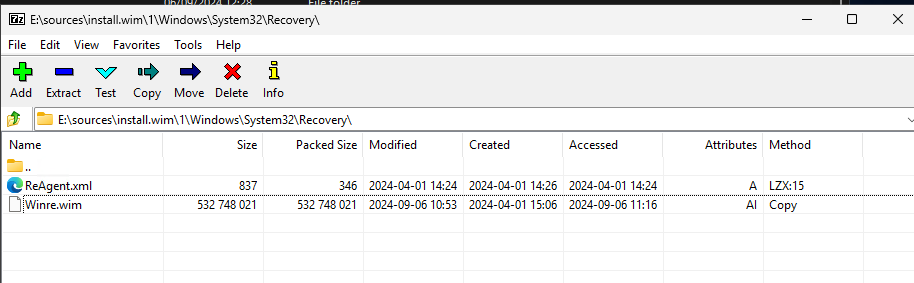
- Extract
- Copy it to your recovery partition.